Objectives
Today I would like to show automation process CI/CD. Process starts from changes in source code trough the Jenkins scripts and ansible playbooks to the image repository and finally to the kubernetes cluster as a new pods and services. This post describes servers configurations, Jenkins configuration and ansible scripts. At the end of this post is verification of exposed service.

Configuration
Kubernetes cluster
Kubernetes cluster was created in my previous post: https://java-architect.blogspot.com/2020/06/how-to-create-ha-kubernetes-cluster-on.html. I'm going to used that cluster.Jenkins server
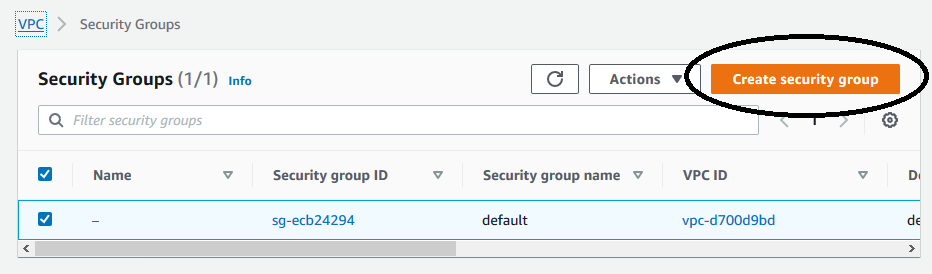
We have a few automation servers to choose. There are tools like Jenkins, GitLab CI/CD, AWS CodePipeline. This time I choose Jenkins with pipeline. I have to mention I used configuration (subnet, VPC, etc.) from my previous post https://java-architect.blogspot.com/2020/06/aws-lambda-python-and-java.html1. Create new security groups
aws ec2 create-security-group --group-name devOpsSg --description "DevOps security group" --vpc-id vpc-d70...The outcome:
{ "GroupId": "sg-0c3aa..."}
2. Add rules to previously created security group
3. Create EC2 instance for Jenkins serveraws ec2 authorize-security-group-ingress --group-id sg-0c3aa... --protocol tcp --port 22 --cidr 0.0.0.0/0aws ec2 authorize-security-group-ingress --group-id sg-0c3aa... --protocol tcp --port 8080 --cidr 0.0.0.0/0aws ec2 authorize-security-group-ingress --group-id sg-0c3aa... --protocol tcp --port 80 --cidr 0.0.0.0/0
aws ec2 run-instances --image-id ami-0a9e2b8a093c02922 --count 1 --instance-type t2.micro --key-name ArtsciKeyPairPPK --security-group-ids sg-0c3aa... --subnet-id subnet-7c... --tag-specifications 'ResourceType=instance,Tags=[{Key=NAME,Value=JENKINS}]' 'ResourceType=volume,Tags=[{Key=cost-center,Value=cc123}]'The outcome configuration:
{
"Groups": [],
"Instances": [
{
"AmiLaunchIndex": 0,
"ImageId": "ami-0a9e2b8a093c02922",
"InstanceId": "i-01d560...",
"InstanceType": "t2.micro",
"KeyName": "ArtsciKeyPairPPK",
"LaunchTime": "2020-06-23T14:06:51+00:00",
"Monitoring": {
"State": "disabled"
},
"Placement": {
"AvailabilityZone": "eu-central-1b",
"GroupName": "",
"Tenancy": "default"
},
"PrivateDnsName": "ip-172-*-*-*.eu-central-1.compute.internal",
"PrivateIpAddress": "172.*.*.*",
"ProductCodes": [],
"PublicDnsName": "",
"State": {
"Code": 0,"Name": "pending"},"StateTransitionReason": "","SubnetId": "subnet-7c...","VpcId": "vpc-d7...","Architecture": "x86_64","BlockDeviceMappings": [],"ClientToken": "3aee19....","EbsOptimized": false,"Hypervisor": "xen","NetworkInterfaces": [{"Attachment": {"AttachTime": "2020-06-23T14:06:51+00:00","AttachmentId": "eni-attach-0...","DeleteOnTermination": true,"DeviceIndex": 0,"Status": "attaching"},"Description": "","Groups": [{"GroupName": "devOpsSg","GroupId": "sg-0c3..."}],"Ipv6Addresses": [],"MacAddress": "06:d7:...","NetworkInterfaceId": "eni-01d...","OwnerId": "920002511415","PrivateDnsName": "ip-172-*-*-*.eu-central-1.compute.internal","PrivateIpAddress": "172.*.*.*","PrivateIpAddresses": [{"Primary": true,"PrivateDnsName": "ip-172-*-*-*.eu-central-1.compute.internal","PrivateIpAddress": "172.*.*.*"}],"SourceDestCheck": true,"Status": "in-use","SubnetId": "subnet-7...","VpcId": "vpc-d...","InterfaceType": "interface"}],"RootDeviceName": "/dev/xvda","RootDeviceType": "ebs","SecurityGroups": [{"GroupName": "devOpsSg","GroupId": "sg-0c..."}],"SourceDestCheck": true,"StateReason": {"Code": "pending","Message": "pending"},"Tags": [{"Key": "Name","Value": "jenkins"}],"VirtualizationType": "hvm","CpuOptions": {"CoreCount": 1,"ThreadsPerCore": 1},"CapacityReservationSpecification": {"CapacityReservationPreference": "open"},"MetadataOptions": {"State": "pending","HttpTokens": "optional","HttpPutResponseHopLimit": 1,"HttpEndpoint": "enabled"}}],"OwnerId": "92...","ReservationId": "r-02..."}
So, we can check the status of created EC2 instance.


4. Check java version. It is necessary java v.8. If you install new java version You will need to apply new environment variables: JAVA_HOME and set PATH (http://openjdk.java.net/install/)
yum install java-1.8.0-openjdk-devel
5. Install jenkins server (follow the link https://pkg.jenkins.io/redhat-stable/)
sudo wget -O /etc/yum.repos.d/jenkins.repo https://pkg.jenkins.io/redhat-stable/jenkins.repo6. Run Jenkins server
sudo rpm --import https://pkg.jenkins.io/redhat-stable/jenkins.io.key
yum install jenkins
service jenkins start7. Unlock jenkins server. Read password from path /var/lib/jenkins/secrets/initialAdminPassword
and put it to the browser <IP_JENKINS>:8080. Then install recommended plugins

and next create admin account

8. Configure jenkins server
Add git
yum install git
and Maven (get and unzip to maven folder)
wget http://mirrors.estointernet.in/apache/maven/maven-3/3.6.3/binaries/apache-maven-3.6.3-bin.tar.gz
tar -xvzf apache-maven-3.6.3-bin.tar.gz -C /opt/maven/
Install plugins


Add missing environment variables using command: vi ~/.bash_profile
# User specific environment and startup programs
M2_HOME=/opt/maven/apache-maven-3.6.3
JAVA_HOME=/usr/lib/jvm/java-1.8.0-openjdk-1.8.0.252.b09-2.51.amzn1.x86_64
PATH=$PATH:$HOME/bin:$JAVA_HOME:$M2_HOME:$M2_HOME/bin
Add final configuration

Finally let's configure ssh connection to ansible server

Ansible server
1. Let's create new EC2 instance similar to previous section.aws ec2 run-instances --image-id ami-0a9e2b8a093c02922 --count 1 --instance-type t2.micro --key-name ArtsciKeyPairPPK --security-group-ids sg-0c3aa... --subnet-id subnet-7c... --tag-specifications 'ResourceType=instance,Tags=[{Key=Name,Value=ansible}]' 'ResourceType=volume,Tags=[{Key=cost-center,Value=cc123}]'
yum install docker
pip install --upgrade pip
pip install ansible
3. Create new user 'artsci' and add privileges and assign to selected group
useradd artsci
passwd artsci
usermod -aG docker artsci
add privileges 'artsci ALL=(ALL) NOPASSWD: ALL' to /etc/sudoers
4. Configure remote access using keys to the k8s cluster
Change file /etc/ssh/sshd_config (section -> # EC2 uses keys for remote access -> PasswordAuthentication yes)Alternatively you can manually copy content of id_rsa.pub to authorized_keys on k8s server
ssh-keygen (as a 'artsci' user -> su - artsci)
Your identification has been saved in /home/artsci/.ssh/id_rsa.
Your public key has been saved in /home/artsci/.ssh/id_rsa.pub
ssh-copy-id artsci@<IP-k8s-cluster> (and copy it to the root)
You can check connection using: ssh -i /home/artsci/.ssh/id_rsa root@<IP-k8s-cluster>
5. Prepare folder to store created packages
mkdir /opt/cluster-k8s
chown -R artsci:artsci /opt/cluster-k8s
Execution
Jenkins server
Jenkins should have configuration to observe source code repository and build a war file and call ansible playbooks if some source code are marked as changed. Below is definition of process.


Ansible server
On ansible server I created playbook scripts to create docker images, save that images to dockerhub and finally deploy that images to kubernetes cluster.
Prepare the ansible-playbook script to create image and push it to the repository (ansible-build-image.yml):
Prepare the ansible-playbook script to deploy previously created image to kubernetes cluster (k8s-deploy.yml)
Prepare the ansible-playbook script to create image and push it to the repository (ansible-build-image.yml):
---
- hosts: ansibleServer
#become: true
tasks:
- name: create docker image (base on war file)
command: docker build -t artsci-simple-image:latest .
args:
chdir: /opt/cluster-k8s
- name: add tag to image
command: docker tag artsci-simple-image artsci/artsci-simple-image
- name: push image to repository (dockerhub)
command: docker push artsci/artsci-simple-image
ignore_errors: yes
- name: remove previously created images
command: docker rmi artsci-simple-image:latest artsci/artsci-simple-image
ignore_errors: yes
Prepare the ansible-playbook script to deploy previously created image to kubernetes cluster (k8s-deploy.yml)
---
- name: Create pods using deployment
hosts: k8s-manageServer
become: true
user: root
tasks:
- name: create a deployment
command: kubectl apply -f /opt/scripts/artsci-deploy.yml
- name: add restart command
command: kubectl rollout restart deployment artsci-deployment
Finally prepare script with kubernetes definition of deployment and service (artsci-deploy.yml)
apiVersion: apps/v1
kind: Deployment
metadata:
name: artsci-deployment
spec:
selector:
matchLabels:
app: artsci-simple-app
replicas: 2
strategy:
type: RollingUpdate
rollingUpdate:
maxSurge: 1
maxUnavailable: 1
template:
metadata:
labels:
app: artsci-simple-app
spec:
containers:
- name: artsci-simple-app
image: artsci/artsci-simple-image
ports:
- containerPort: 8080
---
apiVersion: v1
kind: Service
metadata:
name: artsci-service
labels:
app: artsci-simple-app
spec:
selector:
app: artsci-simple-app
type: LoadBalancer
ports:
- port: 8080
targetPort: 8080
nodePort: 32000
The outcome
After all Jenkins process all changes in git repository

Finally, call the exposed functionality of REST service:
curl --user "admin:admin" --request GET http://ec2-***.eu-central-1.compute.amazonaws.com:32000/artsci/hello
Hello Artsci! :)